Restoring a 1928 portable turntable – Columbia Model 161 – 78 RPM
(Updated April 2022) I’ve just posted a video on YouTube so you can see the player in action! https://www.youtube.com/watch?v=fU_twixVhc8
This is the story of one of my latest restoration project – something I’ve wanted to acquire for a long time. While in Newport, Oregon (a recommended destination!) I was in a large antique store and found a long-unloved wind up record player sitting behind some stuff in a corner. I opened the case and saw it was complete, minus the wind up handle. But it the outer cover and case really needed some TLC. I paid $50 (!) and took it home as a Covid project.
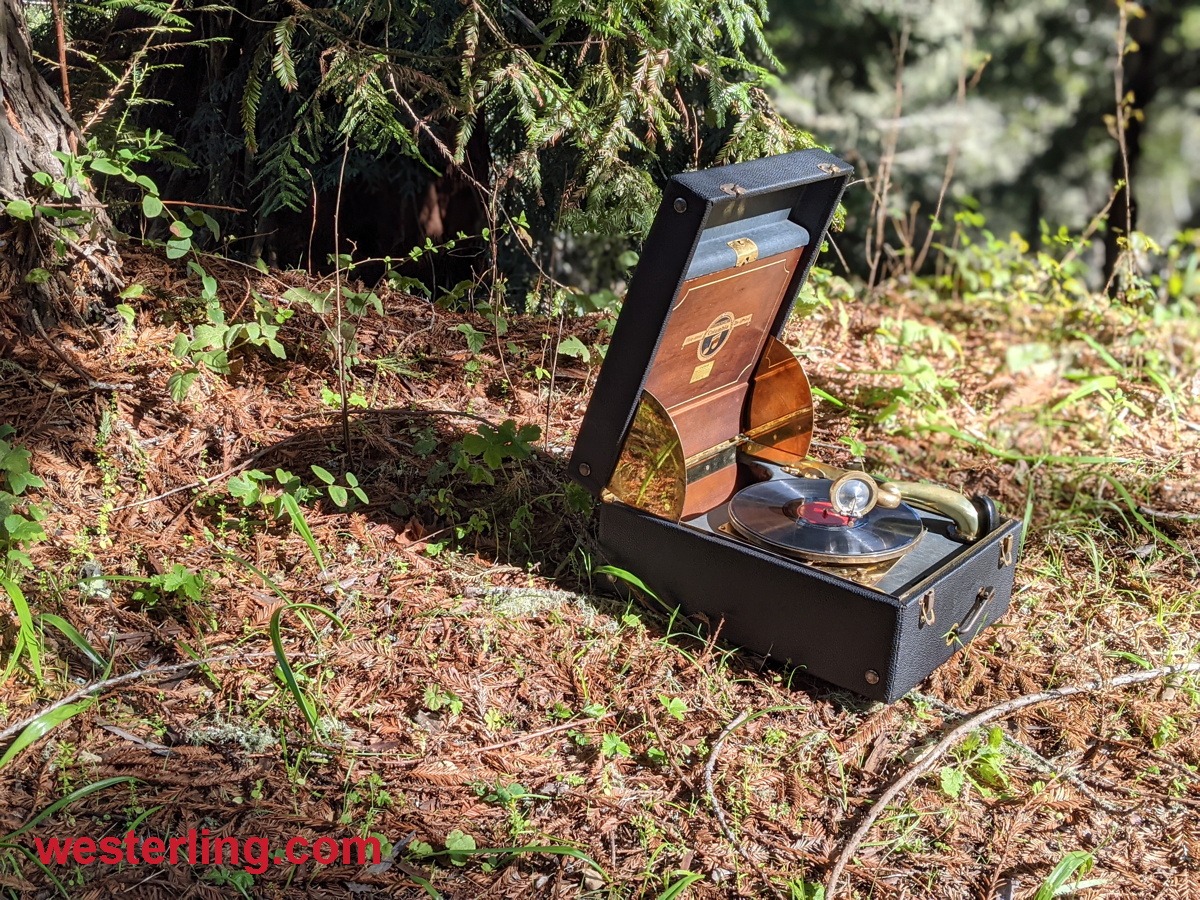
The Columbia Model 161 Grafonola – After restoration. Click any picture for a higher resolution version
The Columbia Model 161 one of the first portable record players to hit the market. This model was also sold in the UK as the HMV “De Luxe”. It works without any electricity and plays 78 RPM records with metal needles. I’m thrilled to say that it sounds great and that I’ve made a few improvements to its operation along the way which you will see below. This model features the superb No. 15 Viva-Tonal reproducer, a double jointed brass tone arm, and metal exponential horn integrated into the case. From a site online I learned it was covered in “fine gray baby alligator Fabrikoid” which hasn’t stood the test of time obviously. The back of the horn and record storage area are finished in mahogany, all of the exposed hardware is polished brass which had been coated in a lacquer which had long since browned and had to be removed. Note that the items I focus on below weren’t necessarily done in this order, so don’t treat this as a restoration manual!
First, a “before” picture: 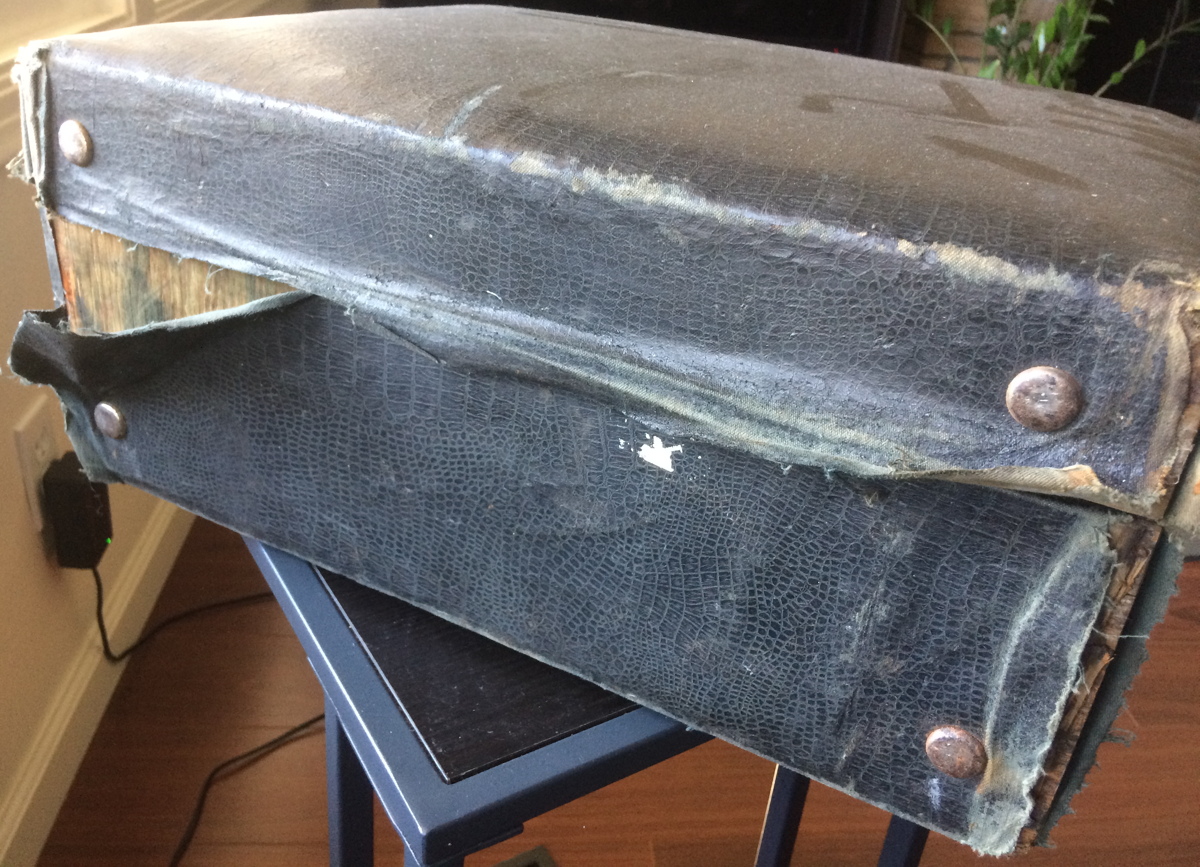
Unfortunately, at one point in its life the player had sat in about an inch of water which got into the entire left side of the machine. This caused the Fabrikoid and the wood to come unglued. Disassembling the machine is straightforward. Take pictures as you go to remember which screws go in which places. The trickiest things to work on are the motor and the reproducer which probably warrant separate take-apart articles.
Fixes:
The reproducer (which holds the needle) is attached to the tone arm with a special large red gasket that was hard, cracked, and disintegrating. 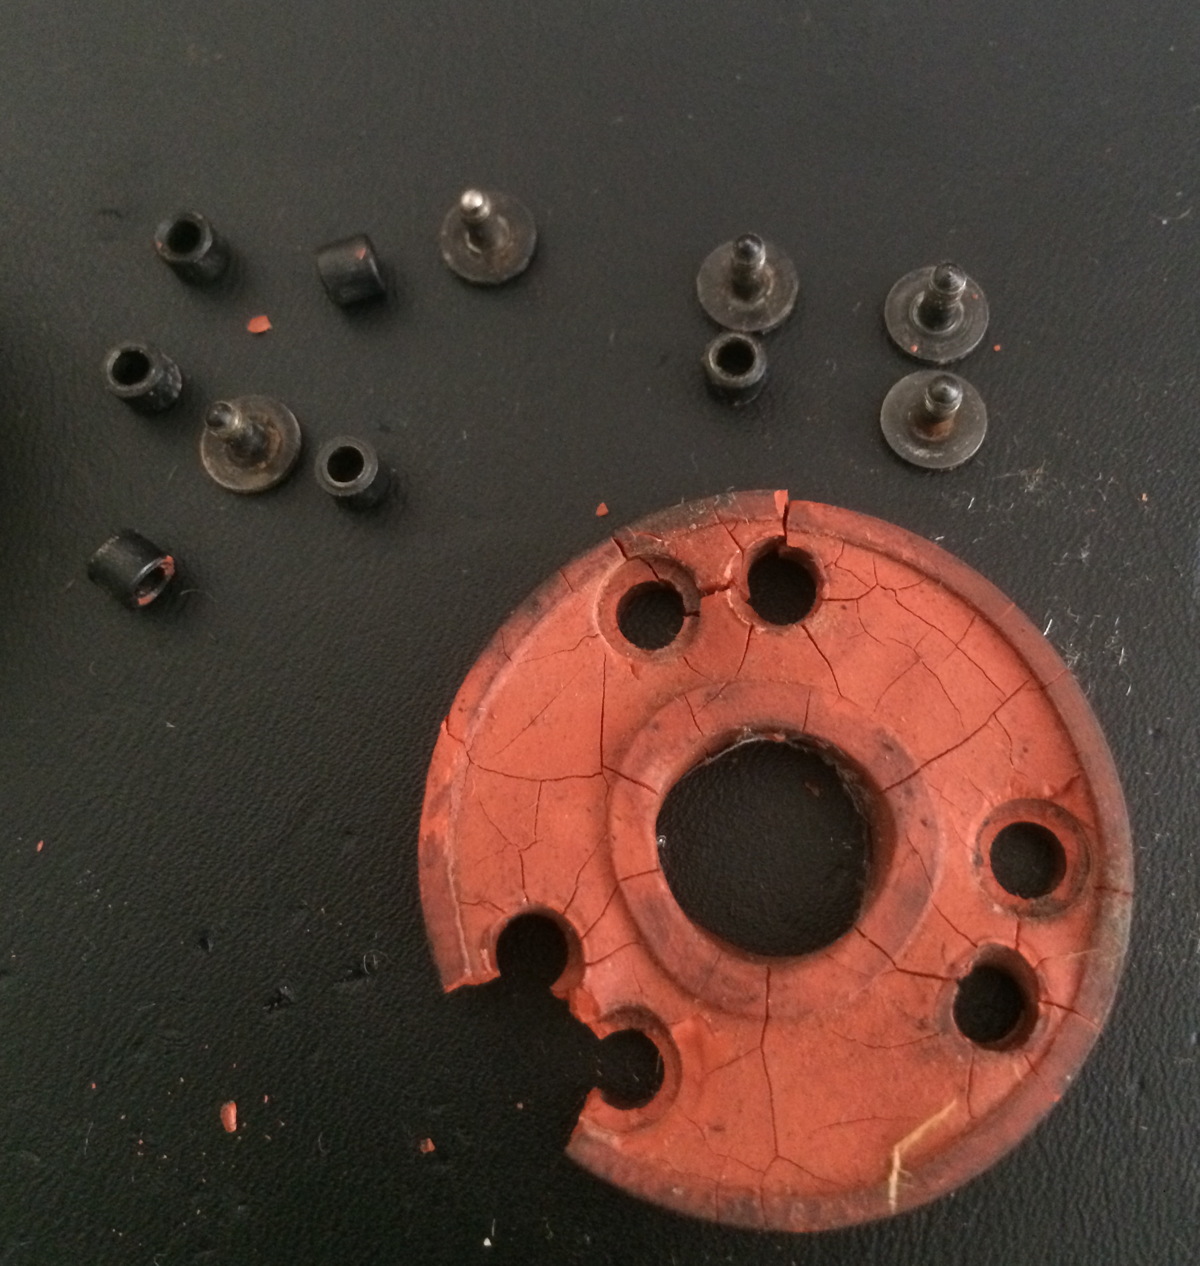 I purchased some 1/4″ red rubber in eBay and used my Dremel to fabricate a new gasket. This worked surprisingly well, so I made a few extras which sold quickly on eBay.
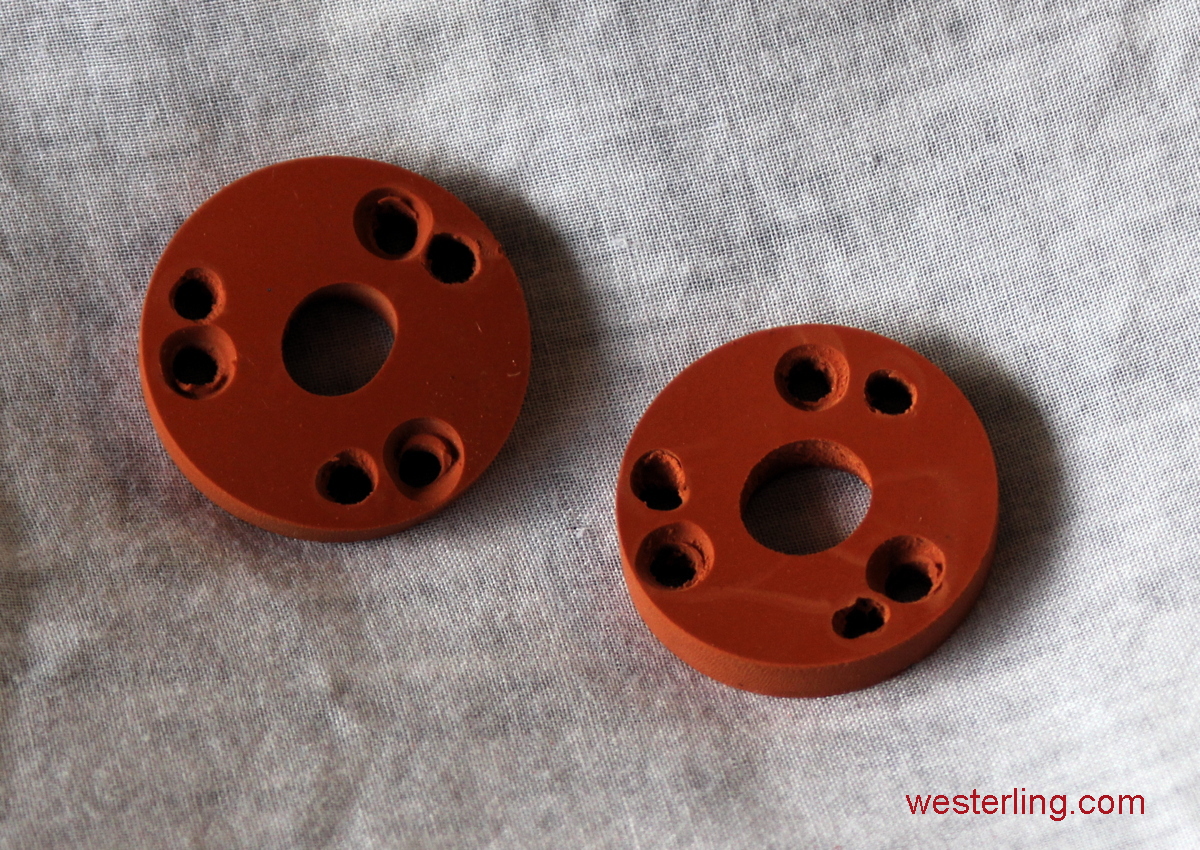
The reproducer itself had two big problems. Firstly, the metal arm which attaches to the needle had completely worn away the aluminum diaphragm where it attaches. Also the rubber seals around the diaphragm were hard as a rock. 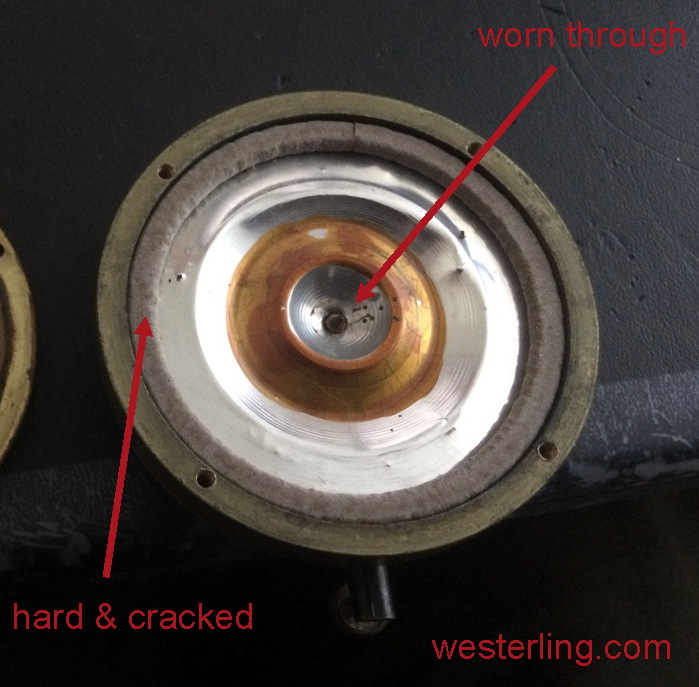 I replaced the entire diaphragm with another aluminum one from eBay that just needed to be trimmed to a smaller diameter. I also sourced some replacement tubing online to go on either side of it. (I will take more pictures of the restored reproducer and post it here).
Brass: Originally Columbia had coated the brass with a lacquer to retain its shine. This probably worked well, but has browned over time and developed many scratches. I used paint remover to coat all the brass and remove the lacquer. Even after this, some areas where the water had gathered meant that there were black spots of oxidation. I used a Dremel with a flattop grinder to remove the oxidation and then polished each piece with a polishing wheel and No. 7 putty. 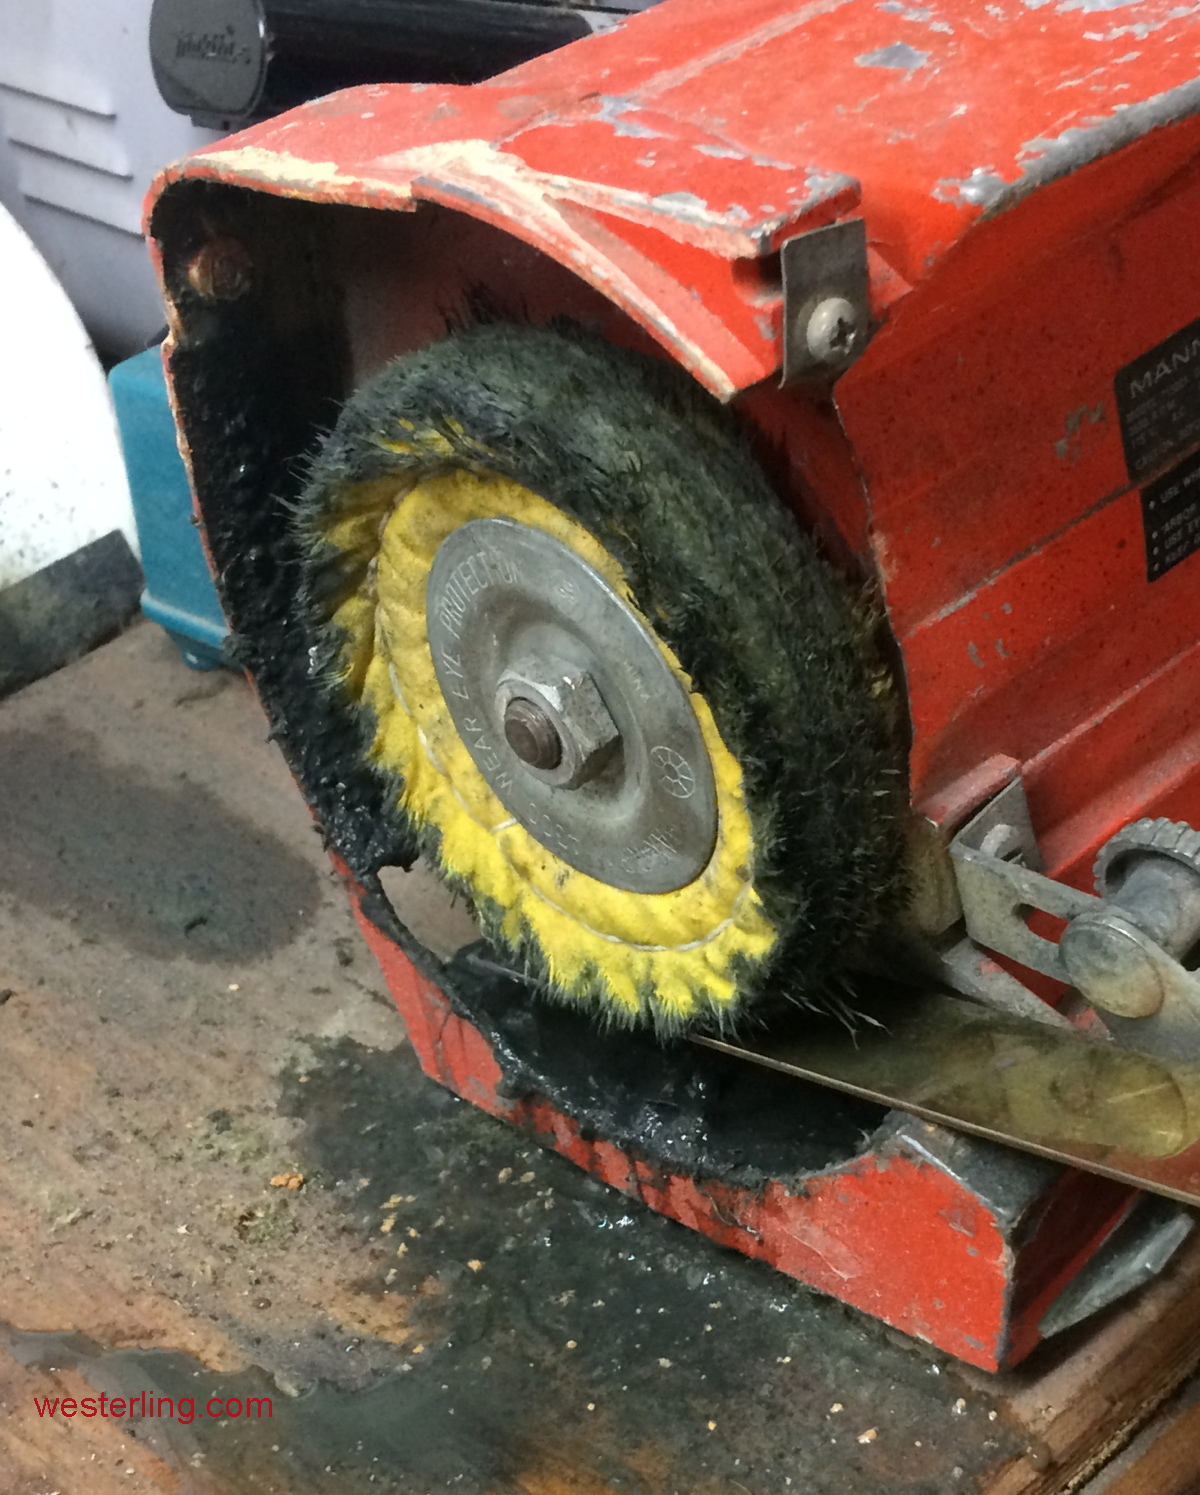
Here’s one of the pieces before. Very dull with lots of pitting on the left: 
and after: 
The brass on this turntable is incredibly yellow, almost like a white gold when it is freshly polished. Really impressive. For now I decided not to lacquer the brass and will post an update whether subsequent polishing with brasso is adequate to keep it nice and bright.
Improvements:
Dynamat:
I added squares of Dynamat on the side of the horn to dampen any resonant vibrations on the surfaces. This also serves to isolate the metal horn from the wood in some places which was not done on the original design.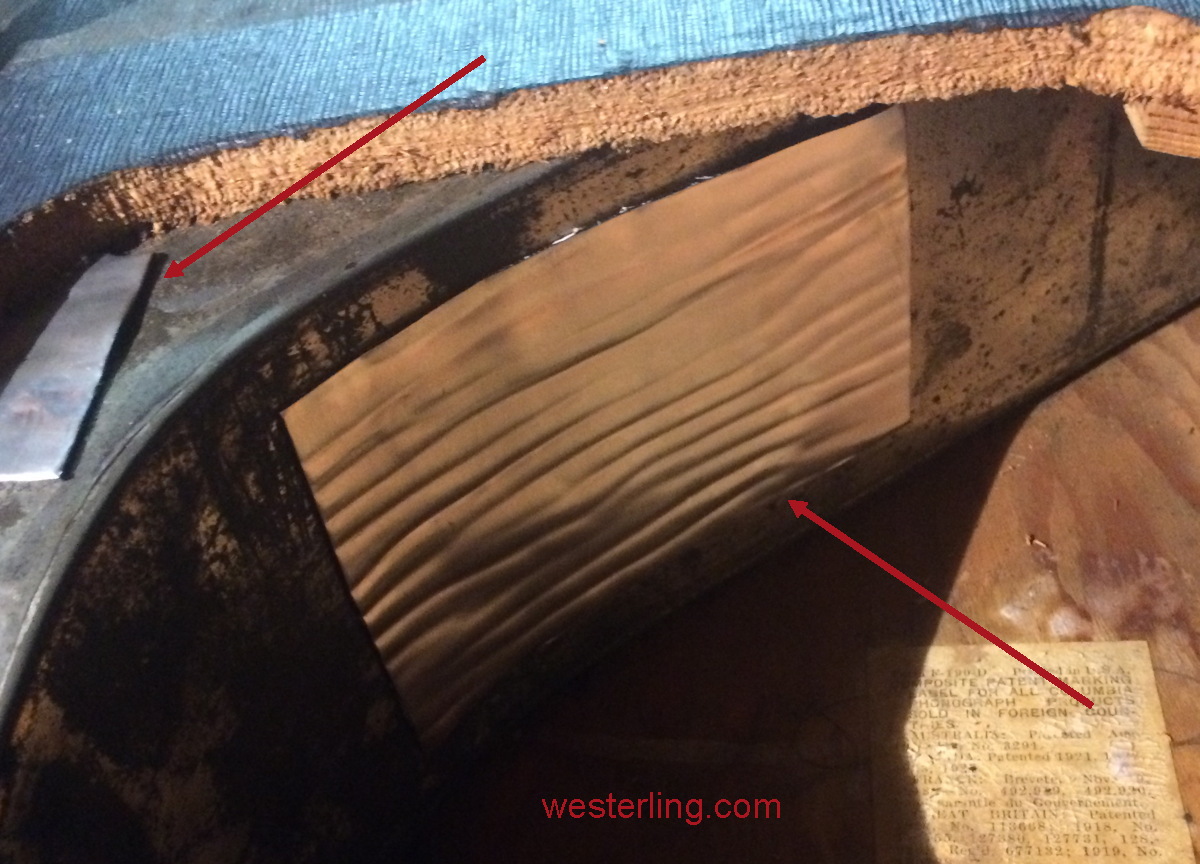
Greased joints:
I put modern and thick silicone automotive grease in the two junctions of the tone arm. this provides for smooth action as well as sound leak prevention. There may have been some grease there originally but it had long since dried out over the decades.
No more hinge marks:
Where the large curved brass side pieces enter the case, they rub against the wood causing scrapes on the brass. Now that I had polished them, I didn’t want the same thing to happen so I put some 3″ wide black painters tape on the interior wood to act as a buffer.
Needle Container: If you shake the turntable, you’ll probably 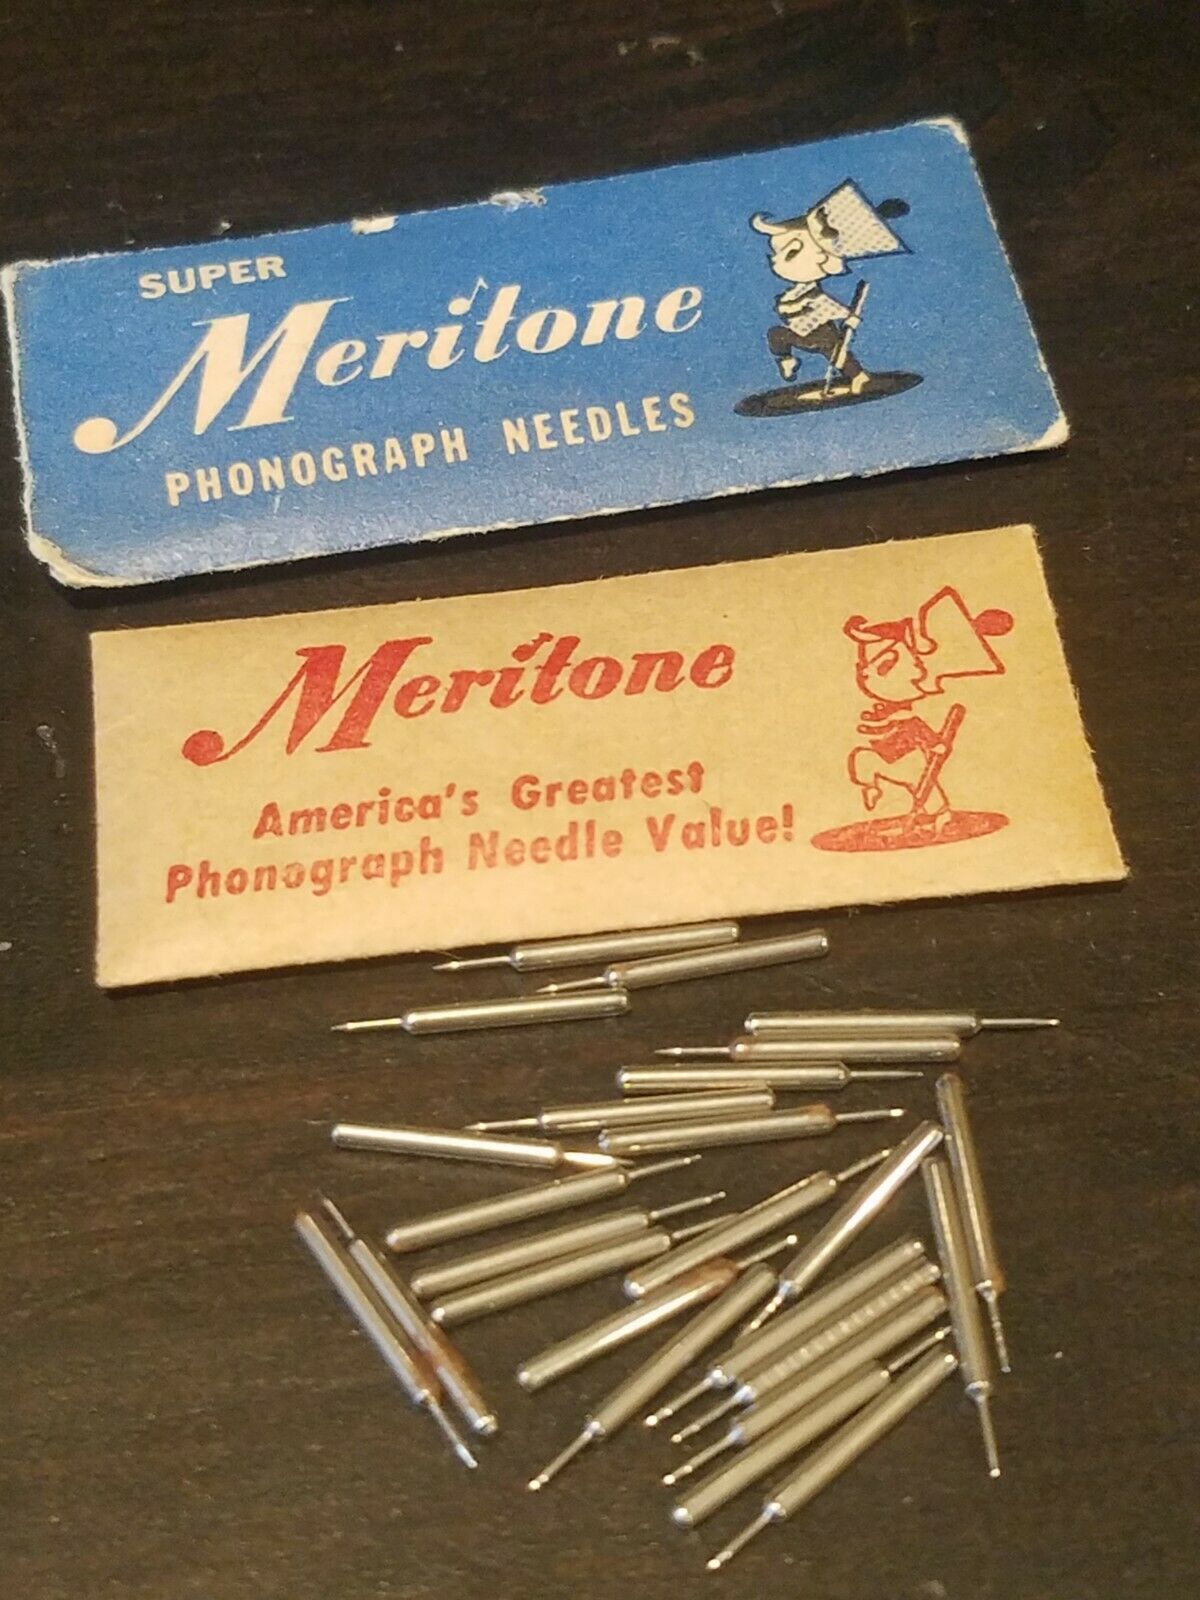 hear many needles rattling around inside. I made two improvements to the needle holding container to try to prevent this in the future. 1) I cut a brass washer to strengthen the spring mechanism to help keep the top closed. [insert pic here]. 2) I used a small hammer to make a tiny dent in the bottom of the cup then used some JB-Weld to glue a small neodymium magnet over the dent. The needles are magnetic and now can’t easily escape while the turntable is carried around!
Needles: Throw out whatever needles you find inside or that came with your player! Spend a few bucks to get some Meritone needles. They’re fantastic and sit properly within the groove. The 161’s motor isn’t as strong as floor standing models, so you risk lowering playback speed if your record is dirty or if the needle is cheap and old. Remember a bad needle will permanently damage a 78 in one play and it will never sound clear again. The Meritones are well made and more narrow at the tip so there’s less friction on the disk. I’ve never had a problem with full-speed playback.
The case:
After removing the covering, it was evident that one of the plywood sides had come completely unglued, so this needed attention. Here is a closeup of just some of the damage.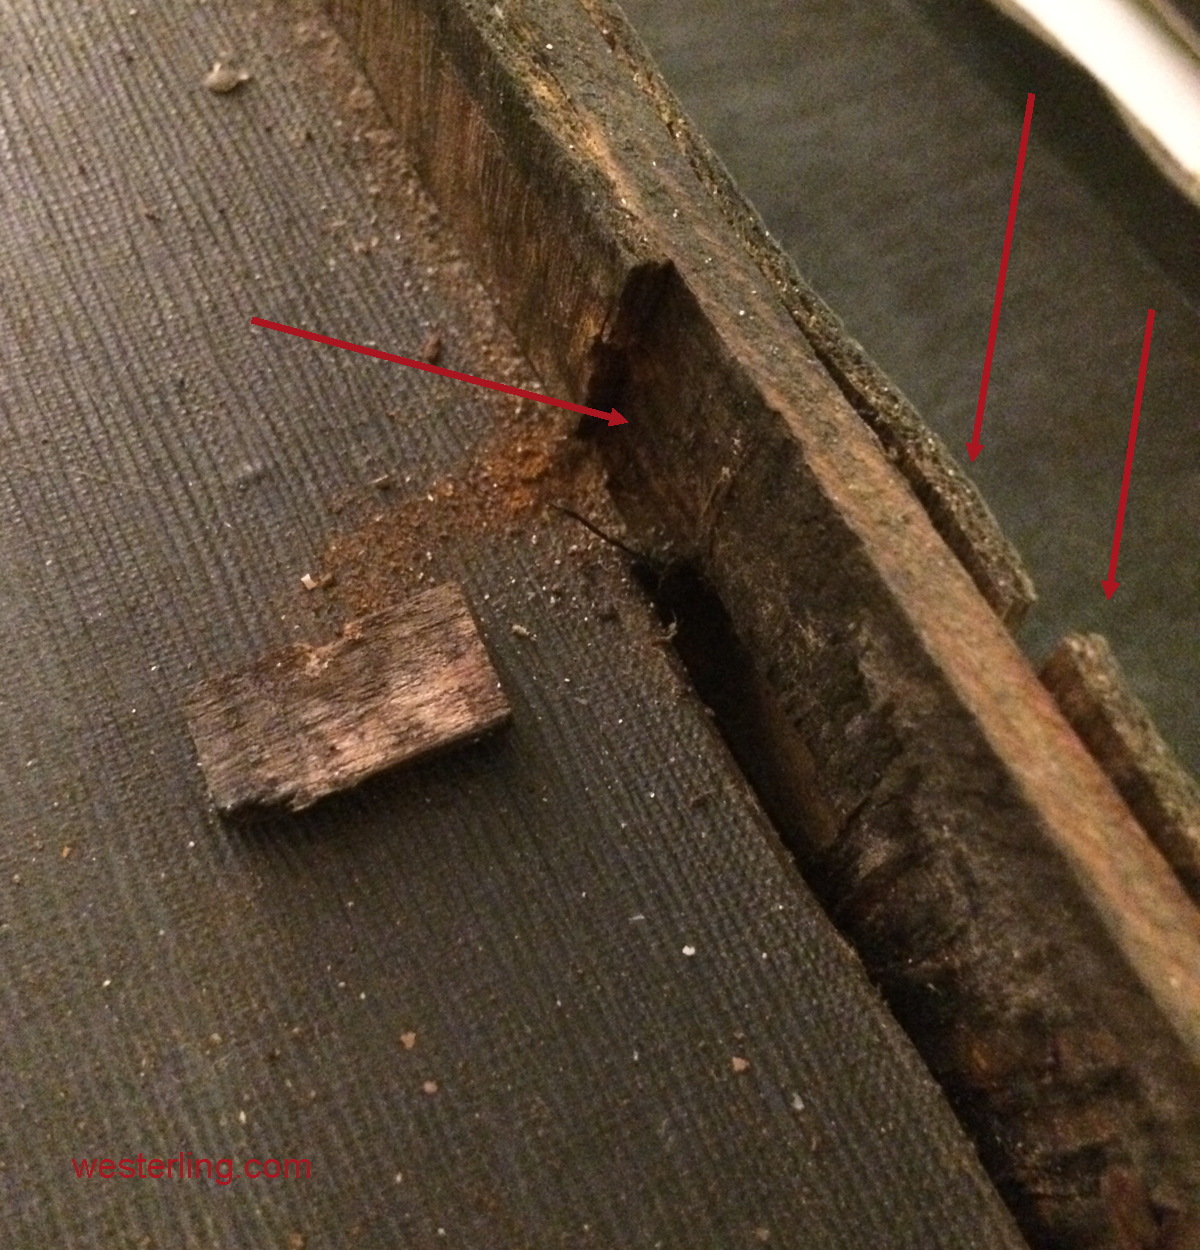
Thankfully there were a few small box nails that had kept things in place, but once these were removed, the damaged panel came right off. I used regular wood glue and clamps and glued each piece and layer back in place one by one. 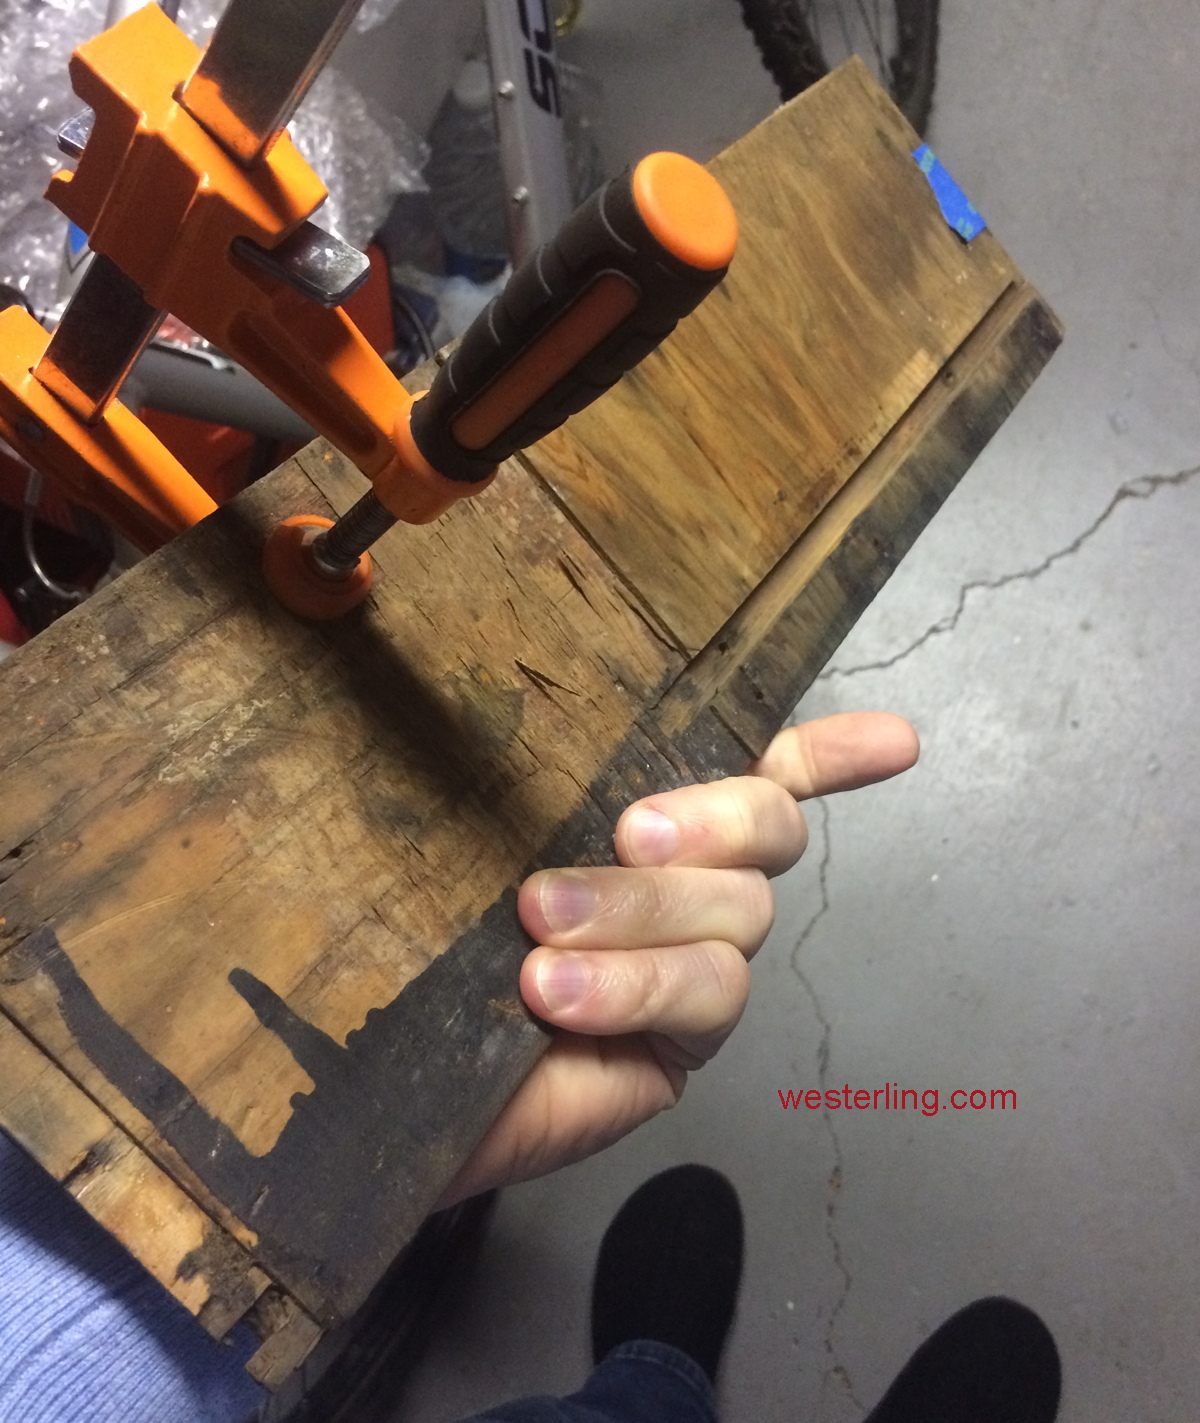
When the panel was solid again, I glued the whole panel back on the turntable and replaced the nails with new ones.

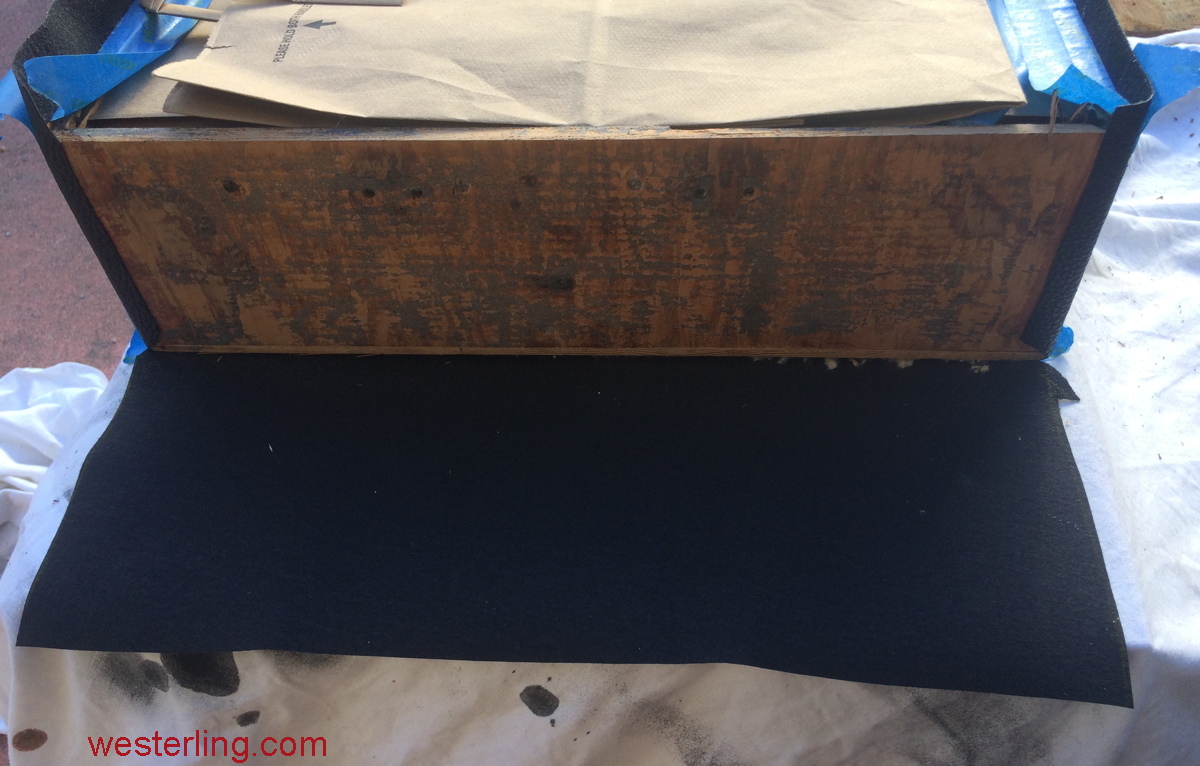
Covering: I’ve never done upholstery before but I decided to give it a go. While baby alligator Fabrikoid isn’t de rigeur these days, I did find a strong and similar looking vinyl covering on Amazon for less than $30. (It is called Soft Faux Leather Sheets 0.95mm Thick for Upholstery, Pebbled Pattern Black). I purchased two yards just to be safe. 
The old Fabrikoid covering can be pried off slowly, and if you take your time it will come off in one piece and you use this as your template for the new covering. Take care to leave the original padding under the cover alone if you can. It is some kind of cotton fiber and acts to soften the appearance of top and bottom of the case. Replicating this could be difficult, so I just left it in place. Once you’ve cut the pattern, sand the wood sides lightly to provide a clean flat surface. Don’t spray any glue on the top and bottom padding, the fabric is just stretched over the top. Glue the new covering in place (I used Polymat 777 – really good stuff) one side at a time. Start with the front and back panels since they have tabs the wrap around to cover the corners. Then finish with the sides. Remember to spray both the wood and the fabric with the contact cement and let it dry for a few minutes and pull the covering tightly as you put it in place.